

Are you encountering difficulties uploading property videos on YouTube? Don't worry; we've got you covered with this step-by-step guide!
Step-by-step instructions
-
Login to YouTube: Sign in to YouTube using your Google account. If you don't have one, you'll need to create it to proceed.
-
Create a Channel: After logging in, establish a channel to upload videos. This channel serves as your platform for managing and showcasing your content.
-
Check File Compatibility: Ensure your video file is supported by YouTube. Accepted formats include .MOV, .MPEG-1, .MPEG-2, .MPEG4, .MP4, .MPG, .AVI, .WMV, .MPEGPS, .FLV, 3GPP, WebM, DNxHR, ProRes, CineForm, and HEVC (h265)
-
Access Upload Options: Click on the “CREATE” icon situated at the top right-hand corner of the window, then choose “Upload videos”. Alternatively, access the “Upload videos” option from your channel dashboard as shown below:
-
Upload Video File: Select “Upload videos” and either click “Select files” to locate the video file on your computer or drag and drop it into the designated
area.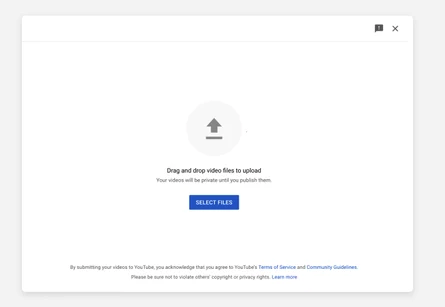
-
Set Privacy Settings: Once the upload is complete, remember to set the video to “Unlisted” to restrict its visibility. This ensures it's accessible only through your property page. If you publish the video publicly, it will be available across YouTube searches.

-
Finalize Upload: Confirm your selection by clicking “Done” after setting the privacy preferences.
Upon successfully uploading your video on YouTube, you can now incorporate the YouTube link into your property listing for enhanced presentation!
NOTE: Once you have uploaded your video on Youtube, you can now add the Youtube link to your property! 🏠 🏠 🏠 🏠
For more details, you can check YouTube's Help Center HERE
Contact Support
If you still have questions or encounter issues, we're here to help.
Contact Us:
-
Wholesaler Support (email): support@investorlift.com
-
Live Chat: Available in your bottom-right corner
🗣Your feedback is valuable to us! Scroll down and let us know if this content was helpful to you. Every rating helps us make our Help Center better for you.