In this article, we will show you all the ins and outs of posting a deal and making sure it sells as fast as it can. Learn tips from the pros so your property doesn't sit around and go unnoticed.
Video Tutorial
In this video tutorial, we will guide you through each step, unveiling valuable insider tips to help you master the art of posting a deal on Investorlift. This tutorial will provide you with the knowledge and strategies needed to ensure a successful deal posting. We will cover everything from optimizing deal descriptions to selecting the most impactful visuals, and even share expert techniques for capturing the attention of potential buyers.
Step-by-step Instructions
To get started with your property, follow these 10 steps to complete each section:
- Open Properties and click "Create Property"
- Enter the property details and click "Save Property"
- Start typing the property address and select the correct address from the drop-down menu of options (once selected, some of the property data may be pre-populated with data automatically pulled in for you).
-
Verify any pre-populated data to ensure it is accurate.
-
Enter Starting Price, Purchase Price, and ARV.
-
Select ‘Parking type’ and ‘Property type’ from the drop-down menus.
-
Add the ‘Year built’.
-
Assign a Dispositions Manager to the property.
-
Add a Buy It Now Price (optional).
-
Add a Repair estimate (min and max).
-
Select a ‘Condition’ from the drop-down menu.
-
Add an ‘Accept offers until’ date.
- Click "Save property" to the bottom of the page.
- Add photos to the property.
- Choose a "Main Image" for the property by clicking the star icon.
NOTE: Make sure you use a horizontal image for the main image of your property!
- Add a video to the property by uploading the video to YouTube and then entering the URL (optional).
PRO TIP: Set the video as "Unlisted" to prevent it from showing up in Google Search results.
If you ever encounter a YouTube video that's showing a Playback ID error when added to InvestorLift, here's what you need to do:
-
Check if the link you add has "shorts" in it.
-
If it does, just replace the part with shorts/ with a watch?v= and it should do the magic!
Sample: https://youtube.com/shorts/DW88qKU6RrU?feature=share
should be changed to https://youtube.com/watch?v=DW88qKU6RrU?feature=share
- Schedule an open house for the property (optional)
-
Navigate to the Open House tab of your property
-
Set the date, start time, and end time for the Open House
Note: If a property is in the "Available" status, a New Open House alert will be automatically sent to all of your buyers.
- Select comps to feature (optional)
-
Option 1: Choose from the list of pre-loaded comps (recommendations from Zillow).
-
Option 2: Create custom comps if the comp you want to add isn't found on the pre-loaded list.
From here, you have the option to pull automatic comps or add a manual comparable.
To add an automatic comparable, just click PULL AUTOMATIC COMPS, and it should add all the applicable comps, if available.
To add a manual comparable, just enter the address of the property you’re adding, choose the address from the dropdown, add all the other information you have, and then hit SAVE.
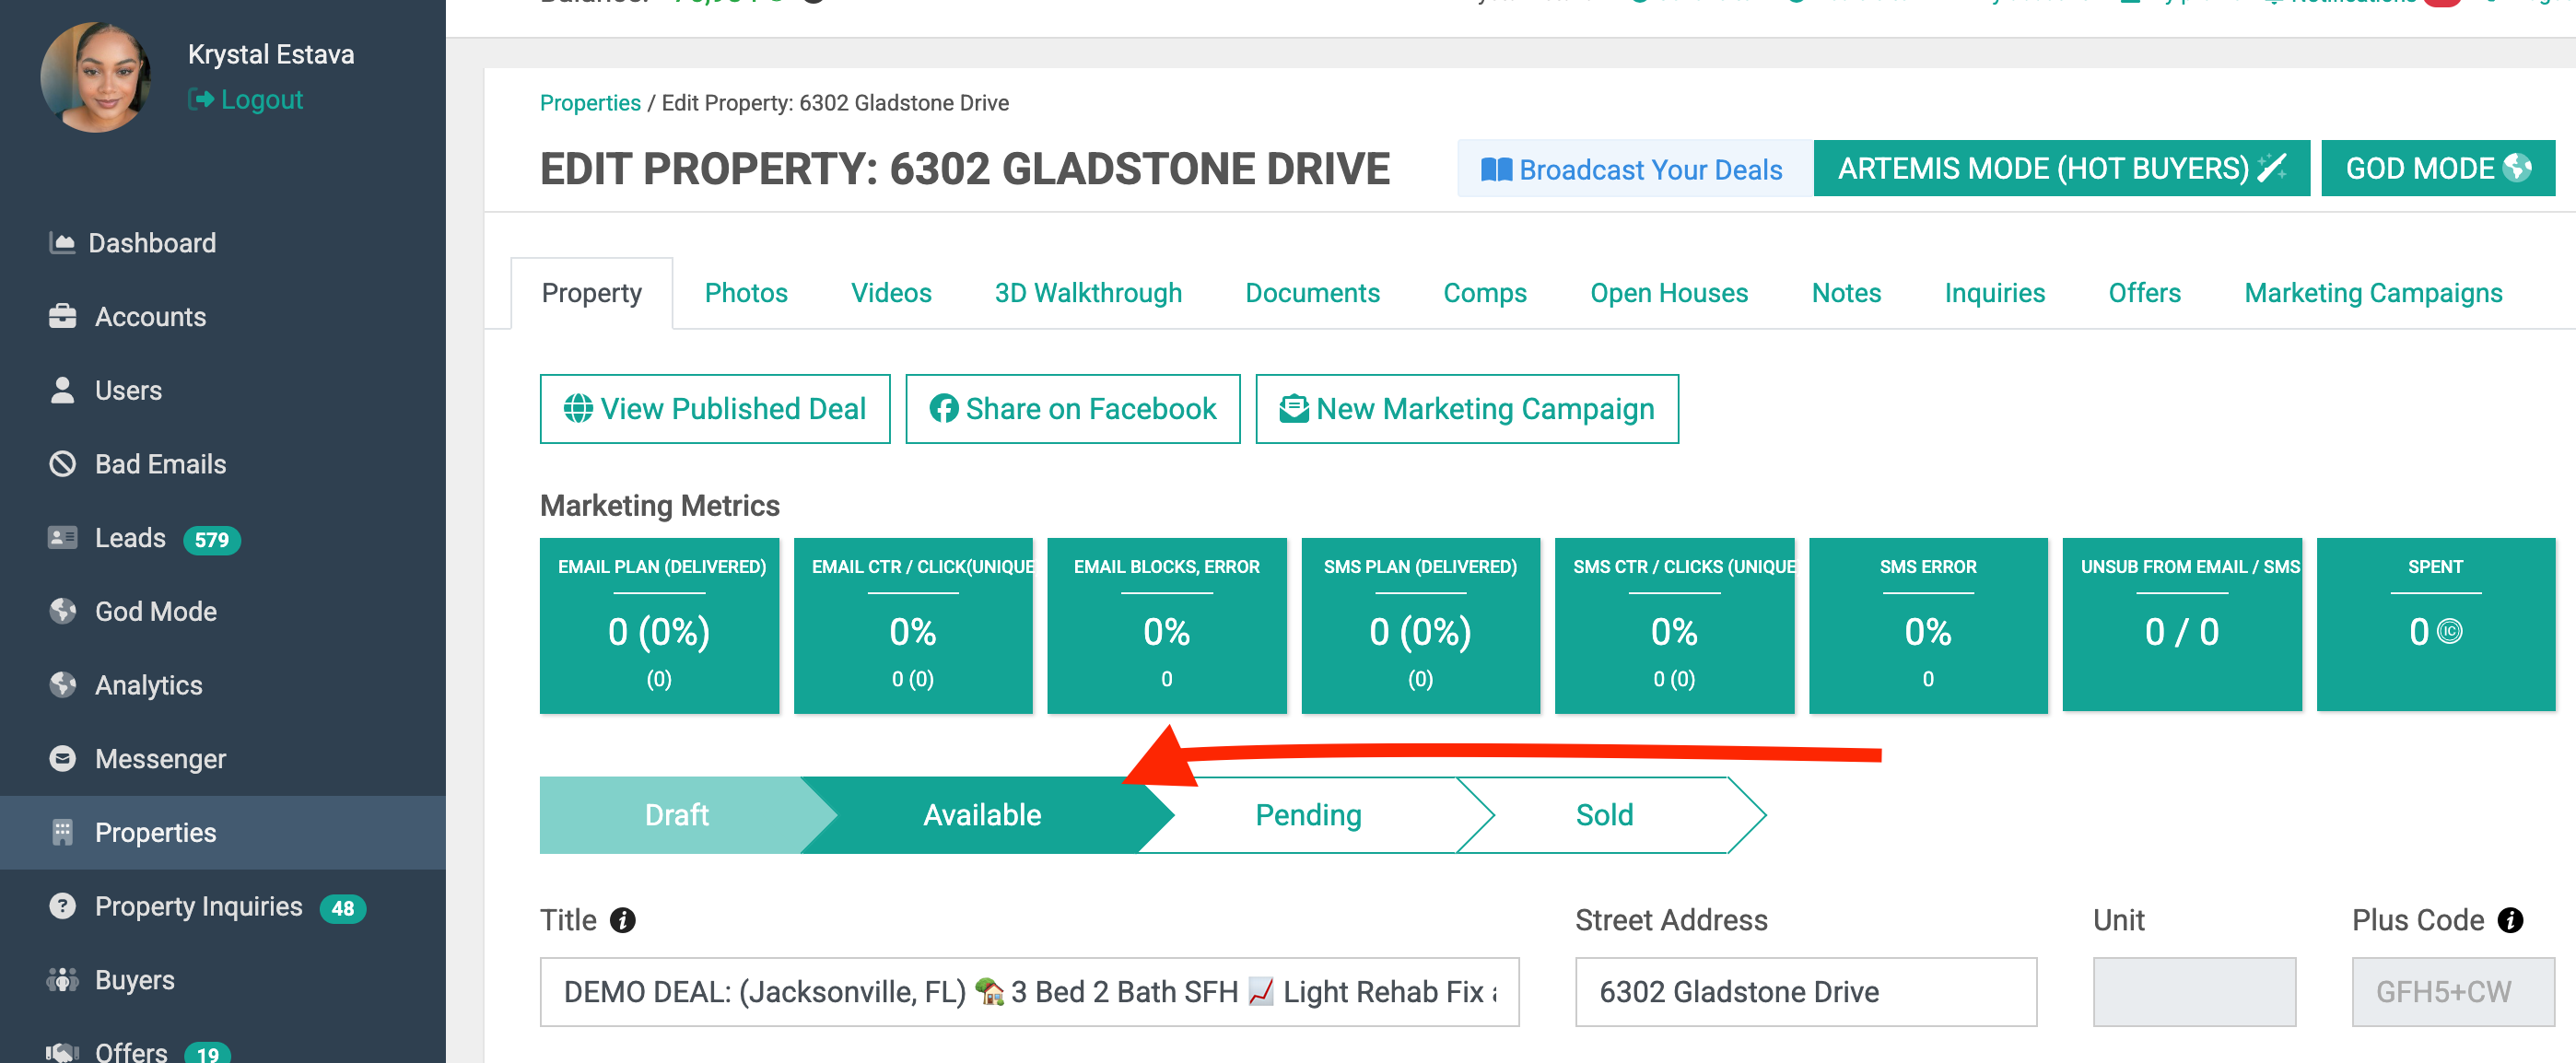
- Set the property status to "Available."

Common Errors
- The company's name is missing in the disposition settings.
- To fix this you need to go to settings > disposition settings and enter the company name.
- Disposition Manager's public phone is not set. Please, set it in “My profile”.

- To fix this, double check who is listed as the Disposition manager and ensure that their number is setup under the ‘My Profile’ tab.
That's it! Your property will now be LIVE on your buyer site.
Contact Support
If you still have questions or encounter issues, we're here to help.
Contact Us:
-
Wholesaler Support (email): support@investorlift.com
-
Live Chat: Available in your bottom-right corner
🗣Your feedback is valuable to us! Scroll down and let us know if this content was helpful to you. Every rating helps us make our Help Center better for you.


