
A deals site is a specialized website designed to showcase real estate properties to potential buyers, investors, and developers. These sites help users find properties at favorable prices, often including residential homes, commercial buildings, land, and even distressed properties. By setting up a deals site on Investorlift, you can effectively capture new disposition leads.
If you’re ready to create a deals site on Investorlift, follow this step-by-step guide.
Please note that you can set up your own deals website if you have an account with an Enterprise (Cartel Boss) or Enterprise Lite (Lieutenant) subscription.
Step 1: Secure Your Domain Name
Before setting up your deals site, you’ll need a domain name. You can purchase one from domain providers such as GoDaddy or Namecheap. Once you have your domain, you’re ready to integrate it with the Investorlift platform.
Step 2: Add Your New Domain
- Log in to the Investorlift Platform.
- Click on “Settings," click on “Domain settings," and click “+ Add Domain Name” to start the process.
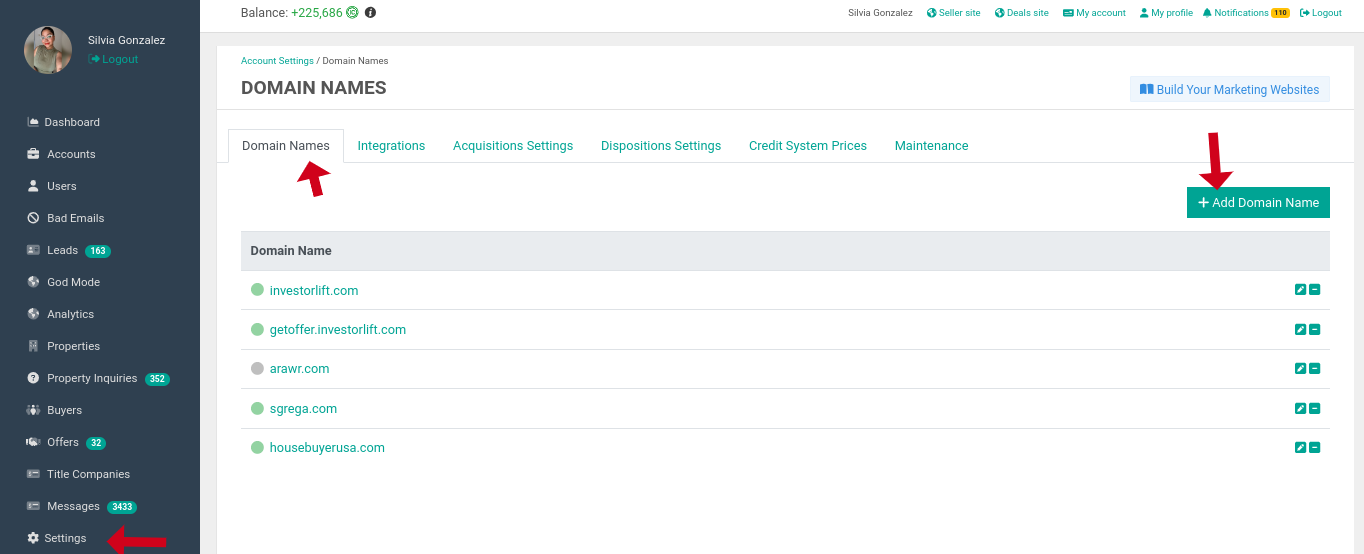
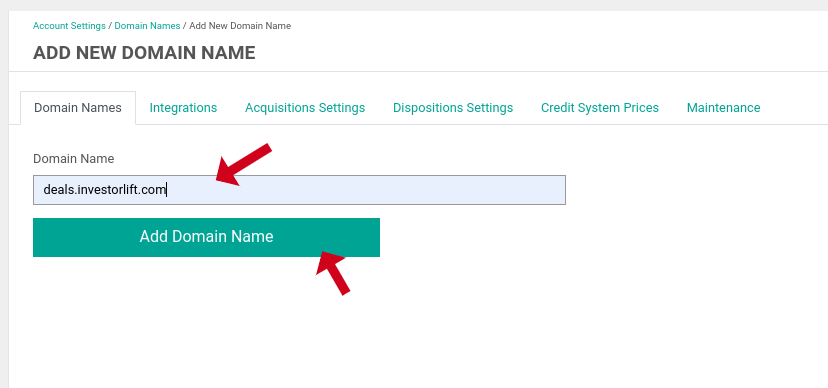
- Add a subdomain like deals., getleads., or dispositions. based on your preference. Copy the URL/link of your domain and paste it into the Domain Name field. For example, your domain could look like deals.investorlift.com. Then, click “Add Domain” to finalize this step.
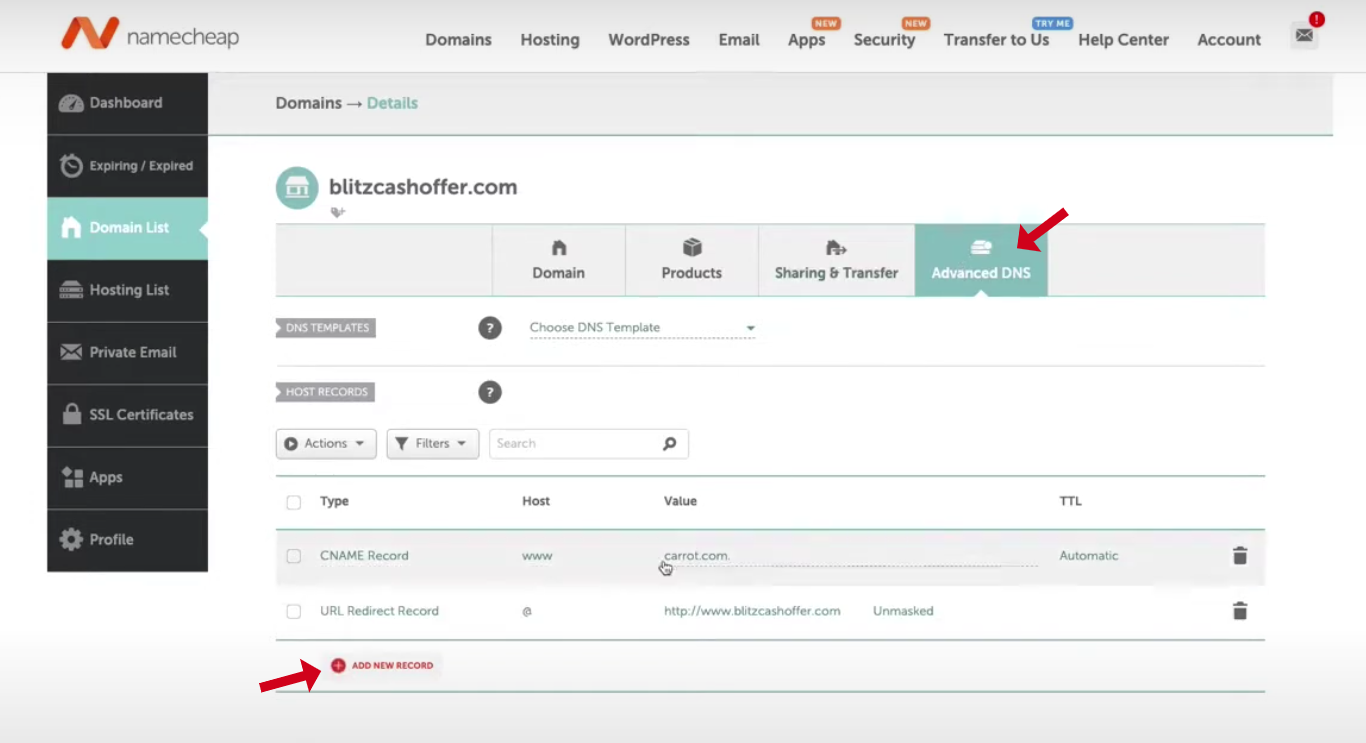
Step 3: DNS Records
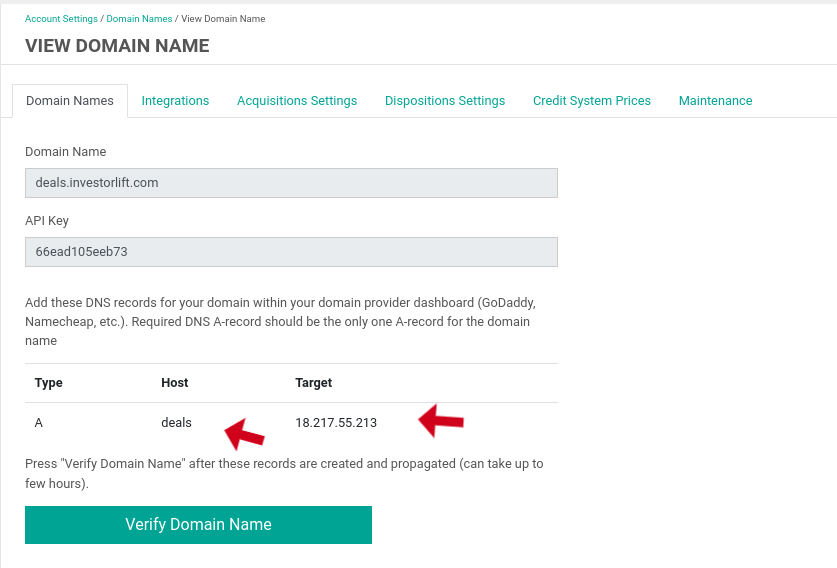
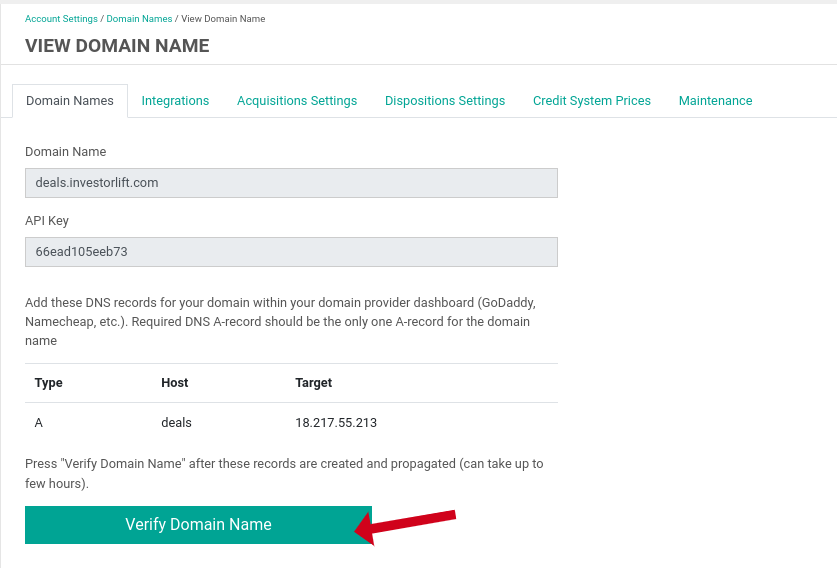
After adding your domain to Investorlift, you’ll be shown a set of DNS records. This information is essential for verifying your domain.
-
Locate the DNS Records:
- Investorlift will provide you with two key pieces of information: the Host and Target (IP).
-
Access Your Domain Provider’s DNS Settings:
- Depending on your provider (such as GoDaddy or Namecheap), log in to your account and find the DNS management section. For Namecheap, this is under DNS Settings/Advanced DNS. Once there, click Add New Record and select A Record.
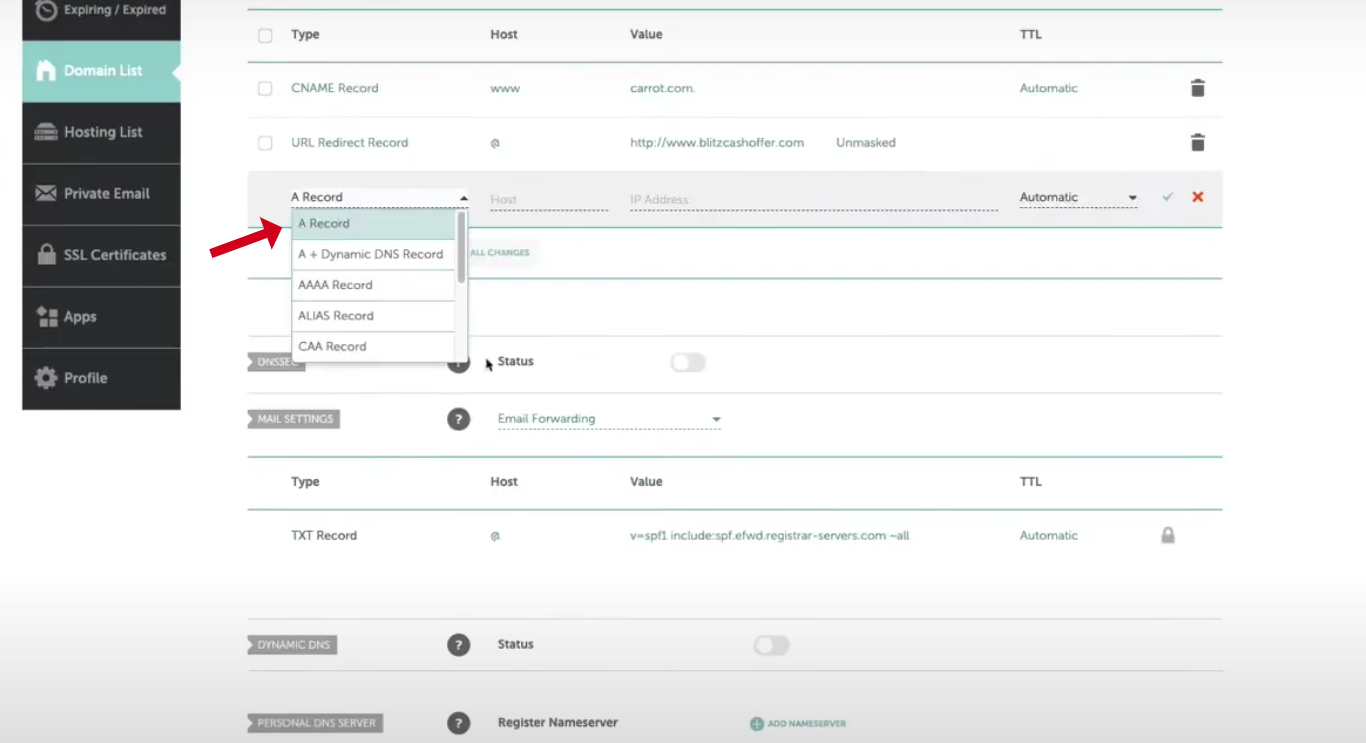
- Enter the DNS Records:
- Input the Host and Target (IP address) from Investorlift into the appropriate fields. Be sure to set the TTL to 5 minutes for quick propagation.
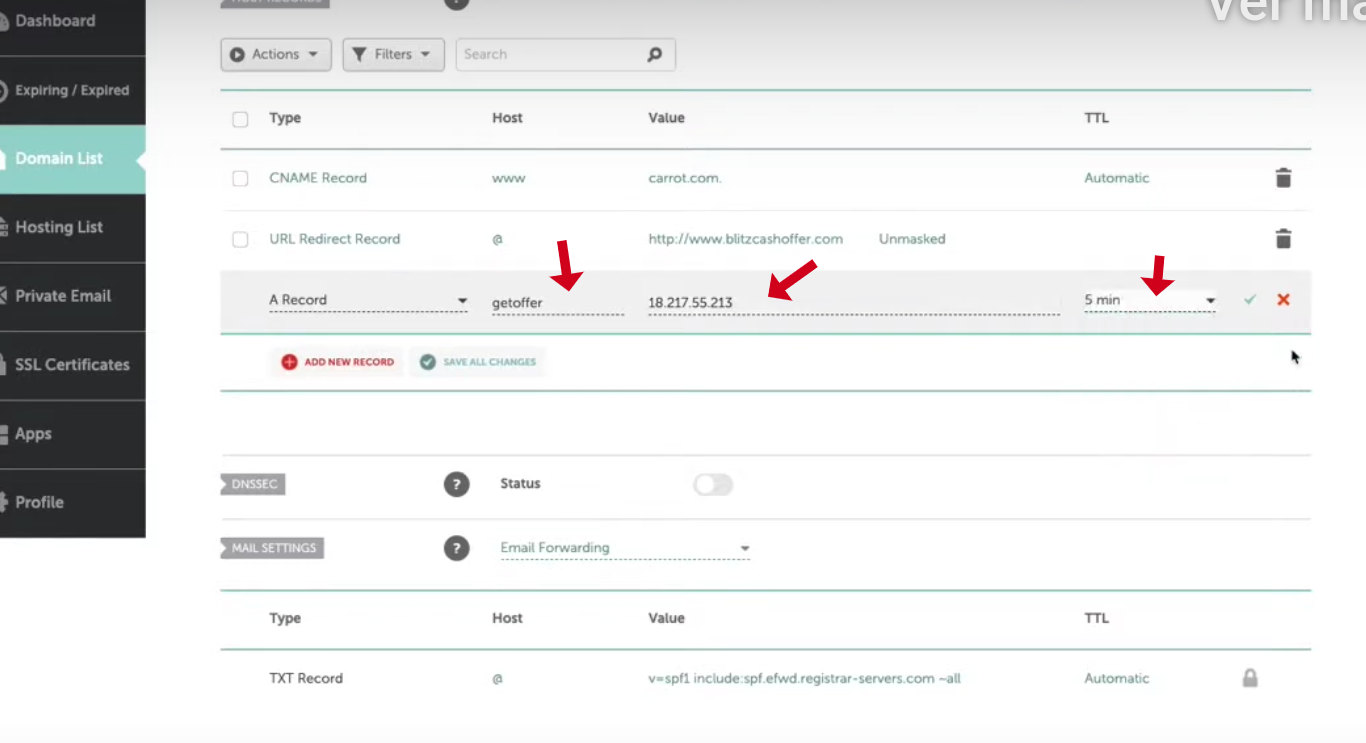
Important: Your domain’s A Record must exactly match the one shown on Investorlift’s platform. Make sure there are no duplicate or conflicting A Records, as these will prevent domain verification. This means that the DNS dashboard can only have 1 A record.
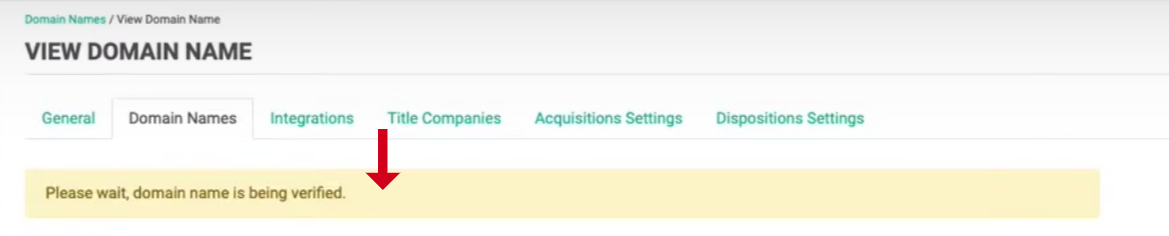
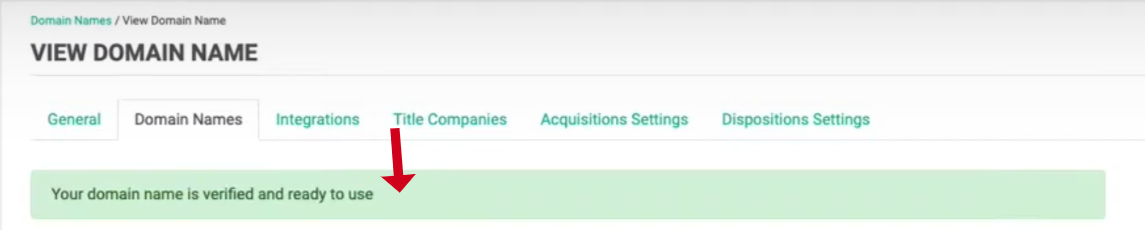
Step 4: Verify Your Domain
Once your DNS records have been added:
- Return to the Investorlift platform.
- Click “Verify Domain Name”. If the setup is correct, a green confirmation bar will appear, indicating that your domain has been successfully verified.
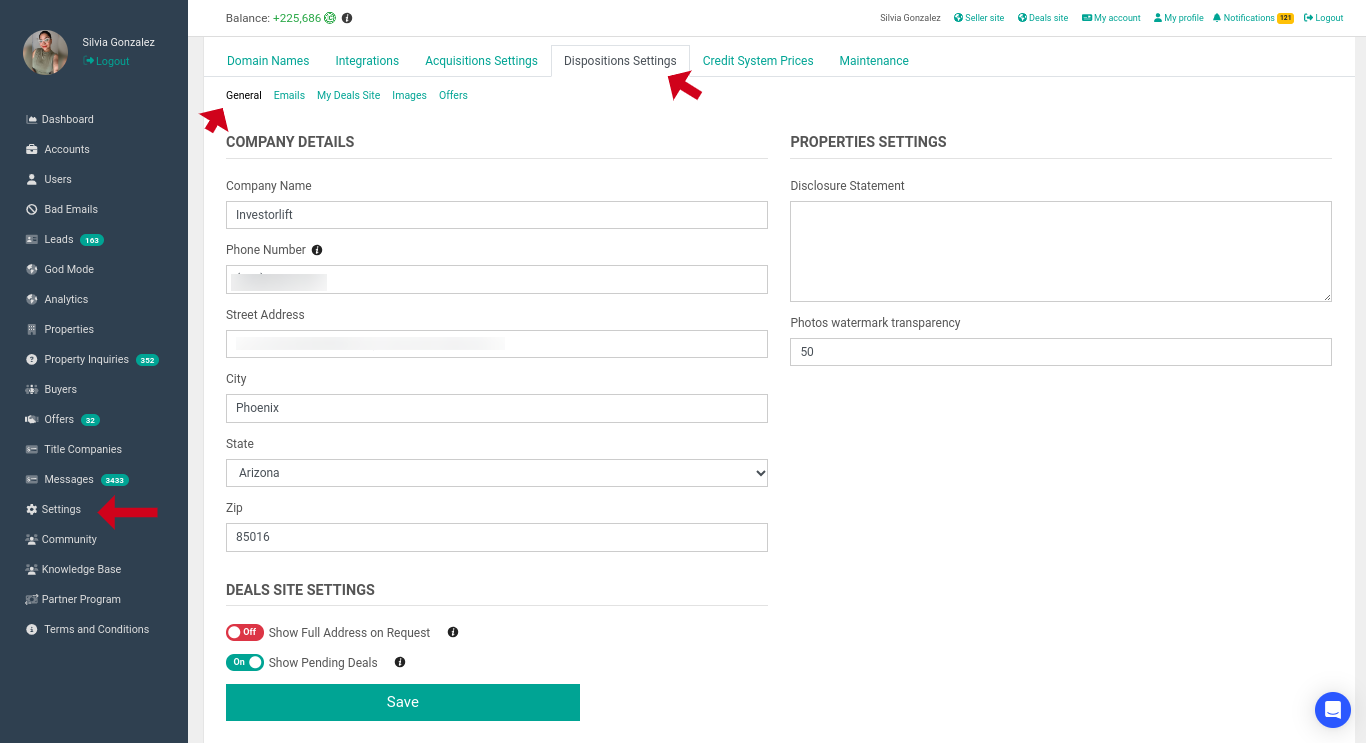
Step 5: Configure Company Details
Next, you’ll need to add your company’s information:
- Go to Disposition Settings.
- Click General and enter your company’s address, contact information, and other relevant details. Click Save to complete the changes.
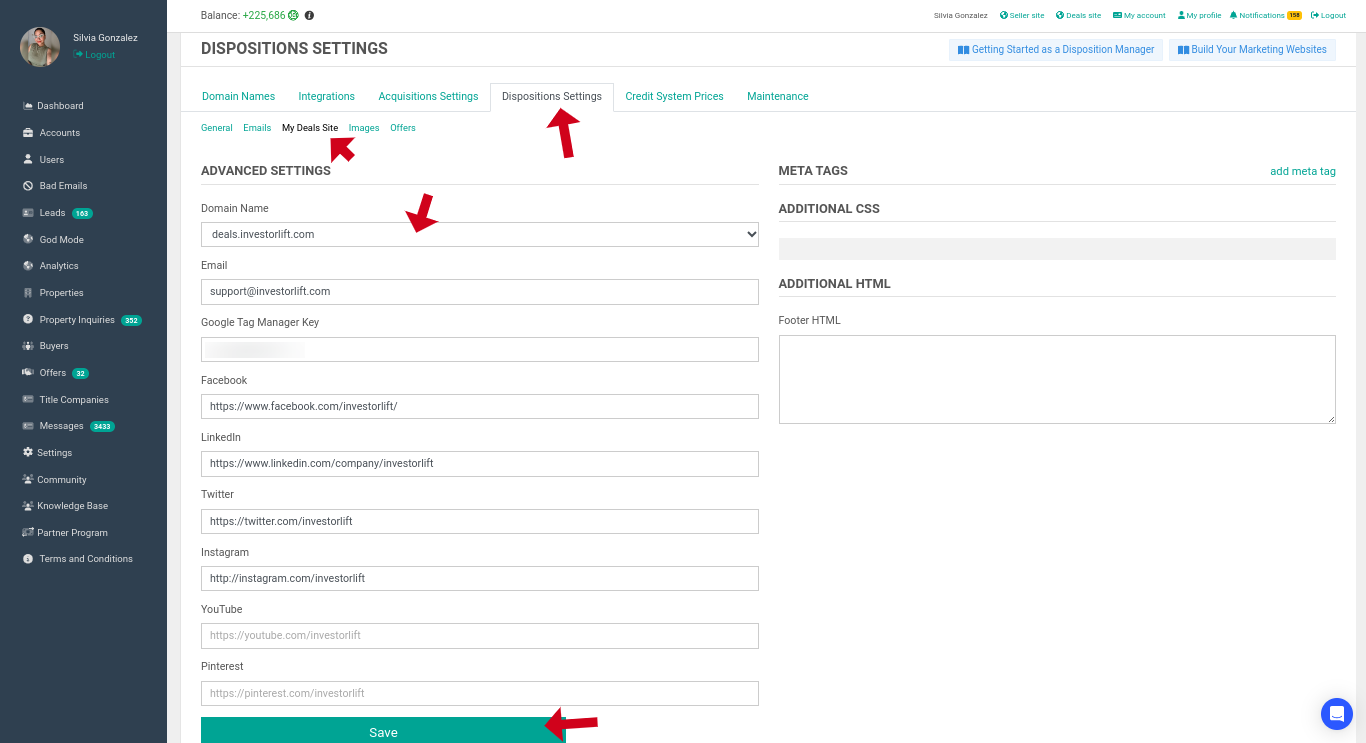
Step 6: Select Your Deals Site
- After your domain is verified, click on My Deals Site in the Investorlift dashboard.
- Under the Domain Name section, select the verified domain you want to use.
- Fill in any additional information required to customize your site, and click Save to complete the changes.
All the settings in Settings > Disposition Settings will directly affect how your deals site appears to visitors. Be sure to review and adjust your preferences for email, images, and offers to optimize the site for your business needs.
Also, note that further changes to an existing Deals site might take several minutes to be applied.
Step 7: Access Your Deals Site
Once everything is in place, click on your website link to access and share your fully functional deals site with potential buyers and investors.

Need Help?
If you encounter any issues during setup or need further assistance, don’t hesitate to reach out to Investorlift's customer support team for help.
🗣Your feedback is valuable to us! Scroll down and let us know if this content was helpful to you. Every rating helps us make our Help Center better for you.